I Got My Raspberry Pi, Now What?
This is a great platform to work with. You have many options when choosing a micro computer. The Raspberry Pi has a large community that makes it easy to work with this hardware. If you have trouble with the hardware or with the scripting or programming for the Pi you can head over to the Raspberry Pi Forum where there is always someone happy to help without being rude and condescending. Unlike most other forums I have encountered, the atmosphere there is refreshing and full of welcome.
What you Need
- Raspberry Pi
- Class 10 Micro SD Card (Others will work but this is recommended.)
- 5 Volt 2 Amp with a Micro USB 5pin Male
- A computer
- A Micro SD Adapter and maybe a USB to SD Adapter as well depending on your needs.
- SD Formatter – Get it at sdcard.org
- Win32 Disk Imager – Get it at sourceforge.net
- Raspbian (The Operating System) – Get it at raspberrypi.org
- Adafruit Pi Finder – Get it at GitHub
- WinRAR – Get it at win-rar.com
- Putty – Get it at chiark.greenend.org.uk
- AngryIPScanner – Get it at angryip.org (Optional)
- A Ethernet connection to your network (internet access)
Install WINRAR
You will need this or some other archive tool to extract everything you have downloaded. I suggest that you extract everything to a familiar place like your Desktop to make it easy to find. You should create a folder to extract the Adafruit Pi Finder to since there are a lot of files.
Preparing the SD Card
Open SD Formatter
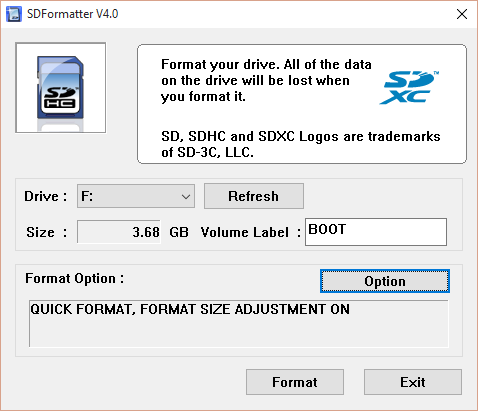

It should find your SD card automatically but you need to verify that the drive letter shown is in fact the drive letter of your SD card. If you format the wrong drive you will erase EVERYTHING. Go to your explorer and verify drive letters there.
Choose the Option button and select Format Size Adjustment to ON. Then click OK then Format. Say OK to the two warnings to Format your SD card.
Install the OS to the SD Card
Open Win32 Disk Imager.

Browse to and select the img file you extracted from the file you downloaded from raspberrypi.org.
Click on Write and wait for it to complete. After its finished safely eject the SD card and insert it into the Pi.
First Boot
Plug in your Ethernet (internet) cable to the Pi then the power cable.
Wait a moment for the Pi to boot, then open the Adafruit Pi Finder by double clicking the PiBootstrap.exe file. Then click on Find My Pi!.


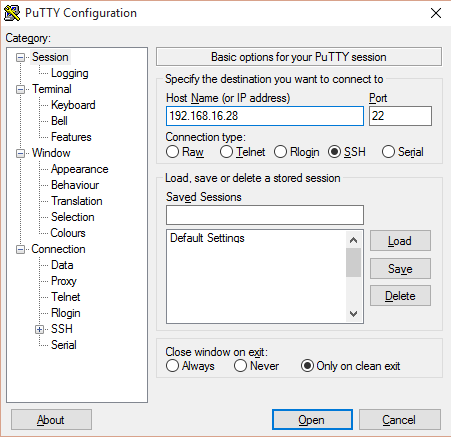
Once it finds your Pi open Putty and type in the IP address of your Pi. I don’t suggest using this tool for anything other than finding the IP address of your Pi. Terminal works most of the time but its frustrating when it doesn’t. The webide is still in beta and has some bugs in the installation.
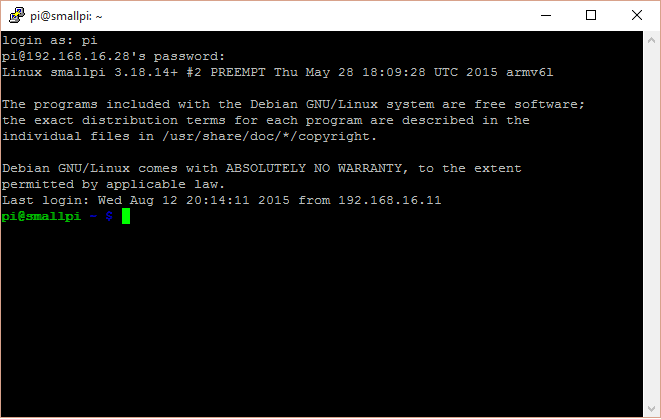
The default username is ‘pi’ and the default password is ‘raspberry’. You will not see any characters being printed on the screen when you are inputting the password, this is normal.
Now run
sudo raspi-config
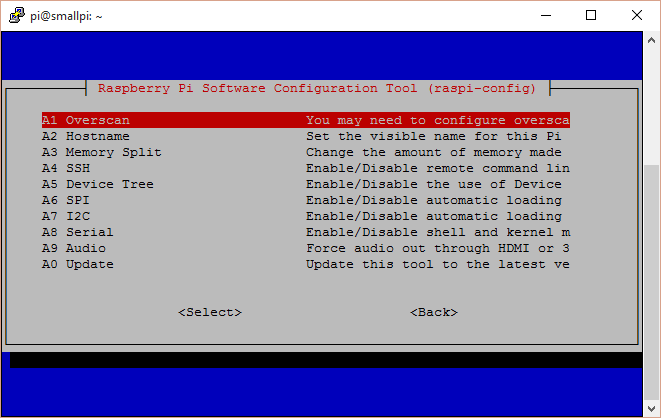
This will take to a window like this.
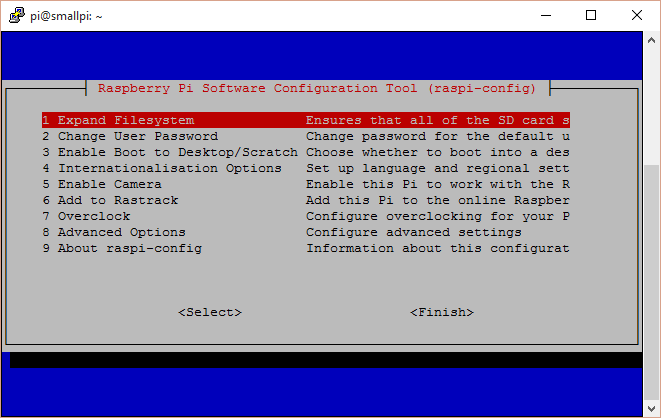
There is no mouse support in this menu. Use the Up,Down,Left,Right,TAB, and Enter keys of your keyboard to navigate.
Press enter on the first option to Expand Filesystem.
After that has finished you will be returned to this menu. Now choose Change User Password. You don’t want your project bamboozled by the internet bullies.
If you wish to automatically go straight to the desktop or to Scratch then make your selection in Enable Boot to Desktop/Scratch.
Next, Set your timezone and keyboard options in Internationalisation Options.
Now If you have the Raspberry Pi Camera module choose Enable Camera. If you are going to use a webcam there is no need to do this step.
If you wish to get the full potential out of your Pi then go to Overclock and choose the option you want for your Pi.
We’re getting close to the end now.
Go to Advanced Options.
Here you are going to set options that are specific to you individual needs. To have continued access using SSH (Putty) you need to enable SSH. Without SSH you must have an HDMI display hooked up to your PI. After each edit in this menu you will likely be returned to the main menu, just go back to Advance options to get back and finsh your optional configurations. Once you are done and back to the main menu select Finish. You should be prompted to reboot. Go ahead and do that now.
Once your Pi has rebooted restart your Putty session and log in.
Now is a good time to make sure that your Raspberry Pi is up to date.
sudo apt-get update
Then
sudo apt-get upgrade
This will take a while. Once it is done reboot your Pi again.
sudo reboot
Once your Pi has rebooted restart your Putty session and log in again.
Static Network Config (OPTIONAL)
You may wish to configure a static IP configuration on your Pi to make it easier to find and work on in the future.
First you need to determine a suitable IP address to use. If you know how to find this out by logging into your router then do that.
Otherwise….
Install and open Angry IP Scanner and click on Start.
This will return a list of all the IP addresses on your network, active and inactive.
Typically your router will only give out up to 50 addresses by DHCP. The rest can be used for static assignment. You need to choose an inactive IP outside of you DHCP range. This can be determined by examining the results of the IP Scanner results. Usually your DHCP will either start at 2 and end somewhere around 50 or start around 100 and go to 150 or 200. If your results have IP addresses in the lower range then use something above 100. Otherwise use something between 2 and 49. Examples: 192.168.1.2, 192.168.0.180, ect..
Now that you know what IP address you are going to use.
Go back to your Putty session and type in
route -n
This will give an output something like this.
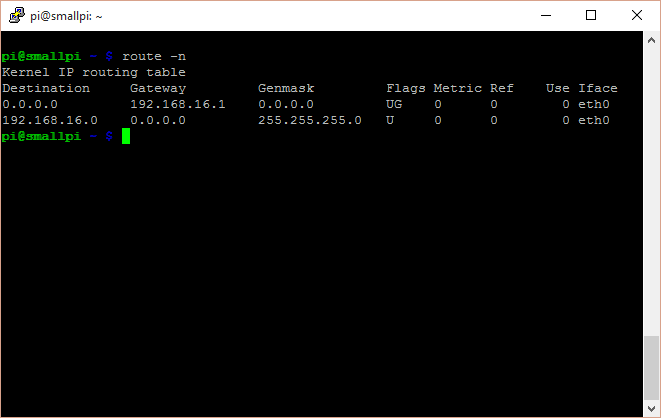
This shows us the Gateway, and netmask. Take note of these.
Example: Netmask:255.255.255.0 Gateway:192.168.16.1
So now you have an IP address, Gateway address, and a Netmask.
Now we have the information we need to configure a static IP address.
Now type in
sudo nano /etc/network/interfaces
You will see something like this.
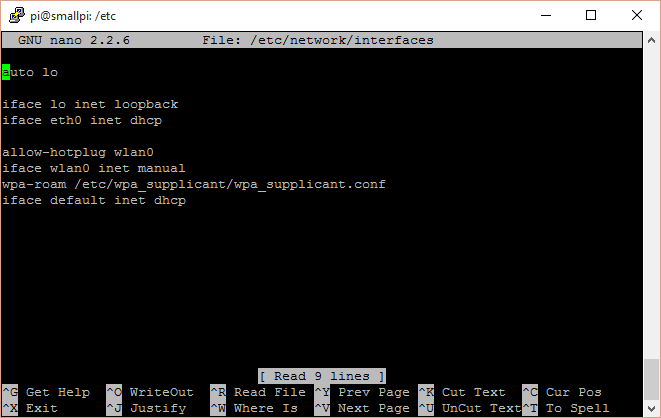
Change it to look like this using your IP information.
auto lo
iface lo inet loopback
iface eth0 inet static
address 192.168.16.28
netmask 255.255.255.0
network 192.168.16.0
broadcast 192.168.16.255
gateway 192.168.16.1
nameserver 192.168.16.1allow-hotplug wlan0
iface wlan0 inet manual
wpa-roam /etc/wpa_supplicant/wpa_supplicant.conf
iface default inet dhcp
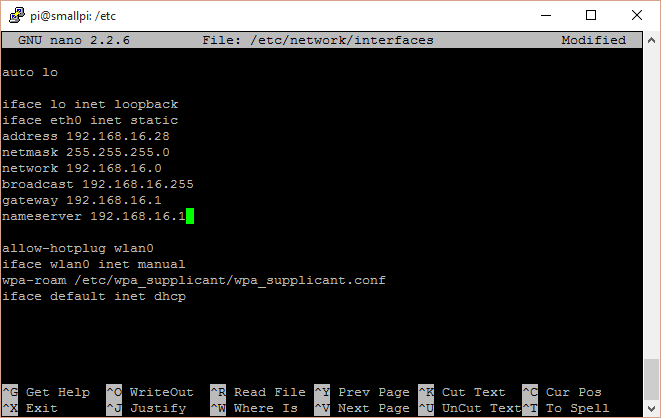
Then hit Ctrl+o to save it and Ctrl+x to exit
Now reboot
sudo reboot
If you would like to be able to log into your Pi’s desktop remotely See my Post Raspberry Pi VNC Server Setup.

You must log in to post a comment.